

Microsoft SharePoint Tenant to Tenant Migration Guide
Introduction
The Apps4.Pro Migration Manager guide provides a step-by-step process for migrating Microsoft SharePoint sites between tenants or within the same tenant using Apps4.Pro Migration Manager.
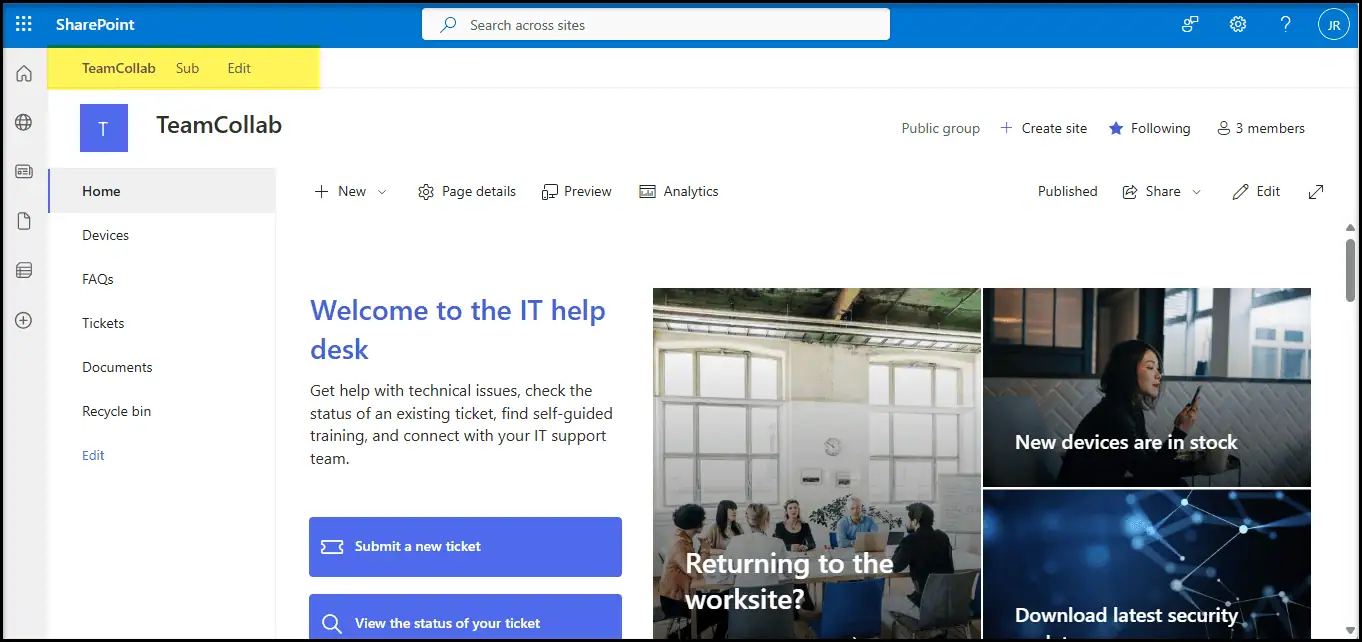
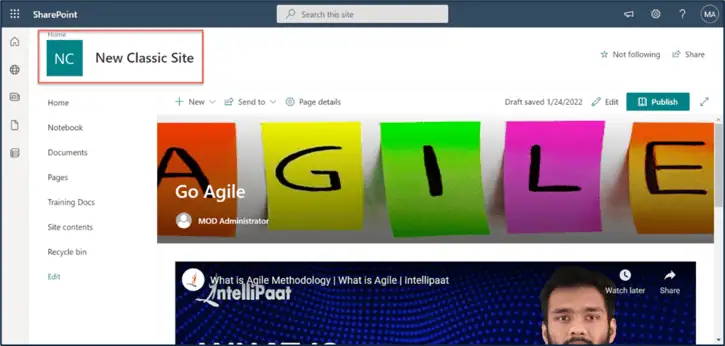
It covers types of Sites such as Modern Team Sites, Communication Sites, Classic Sites & Hub Sites along with the entire components of SharePoint, including Site Collections, Site Permissions, Site Pages, Subsites, Lists, List Items, Library and all individual Settings.
No Limitations
- During SharePoint Migration, there are no limitations on the number of sites, files, libraries, lists, permissions and OneNote files that can be migrated. The process ensures a seamless transfer of all associated data without any restriction.
- Securely migrate files of any size without limitations.
Scope of Microsoft SharePoint Migration
The migrated and non-migrated items are listed below for Microsoft SharePoint Online Migration.
Roles & Licenses for SharePoint Migration
- Valid Microsoft 365 / Office 365 License with SharePoint app enabled is required for Source & Target Connector Accounts.
- SharePoint Administrator role with Admin Consent and Delegated Permission is required for Source & Target Connector Accounts.
- Term Store Administrator role is required for Source & Target Connector Accounts, to migrate Term Group.
- Source Connector Account must be a ‘Site Admin’ for all SharePoint sites included in the migration scope.
- Target Connector Account must be a ‘Site Admin’ for all the existing target SharePoint sites included in the migration scope.
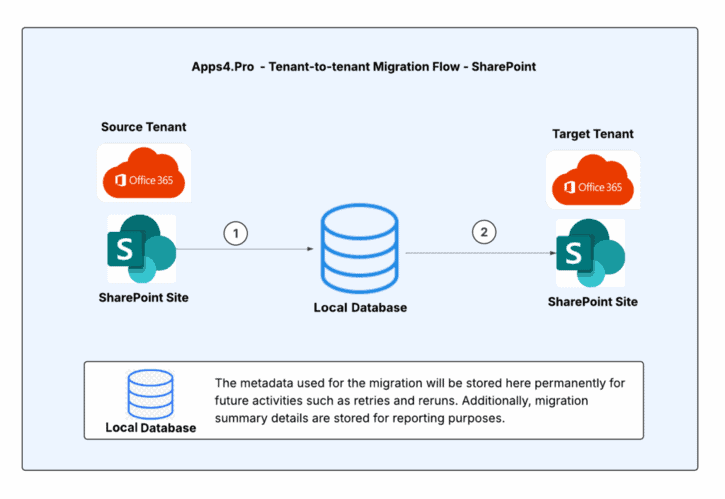
Architecture Diagram
Microsoft SharePoint Inventory Report
Follow the below steps to export the Inventory Report of “Source Tenant SharePoint Sites” for better migration planning.
Step 1: Open Windows PowerShell ISE as “Run as administrator”
Step 2: If “Microsoft.Online.SharePoint.PowerShell” module is not installed already, install it
- Using cmdlet given below
Install-Module Microsoft.Online.SharePoint.PowerShell
(OR) - Using the SharePoint Module Exe: https://www.microsoft.com/en-in/download/details.aspx?id=35588
Step 3: Download and open the below script from PowerShell
Script File Link: GetSharePointSiteDetails.ps1
Step 4: Update the $AdminCenterURL variable with your “Source Tenant’s SharePoint Admin URL” and the $CSVpath variable with the “local path to export the site details” in the script.
Step 5: Run the script. Once it runs successfully, you will find the CSV file saved in the location specified in the $CSVpath variable within the script.
Note: Ensure the script is executed using an account that holds either the “SharePoint Admin” role or the “Global Admin” role for proper permissions.
Sample Output file: SharePointSiteDetails.csv
Pre-Migration Setup for SharePoint Migration
Before migrating, Microsoft 365 SharePoint using Apps4.Pro Migration Manager, it is essential to understand the migration requirements for both the source and destination endpoints. Ensure that all the following requirements are met for a smooth migration process.
Admin Consent & Delegate Permission
Apps4.Pro has its own Azure AD application, which gets registered during the application configuration.
Since migration uses service accounts with minimal privileges, Admin must provide Admin Consent & Delegate Permission just by clicking a link
- Please contact us at presales@apps4.pro for the link
- Request the admin to open the consent URL in their browser and sign-in with the admin account.
- Click “Accept” to provide consent to use the Apps4.Pro app.
When the admins consent using the consent URL,
- Application registered: “Apps4.Pro”, the required scopes are added with delegated permissions
- APIs involved: CSOM (Client-Side Object Model) and PnP PowerShell
Required Permissions for Source Connector:
Admin Consent: [Delegated Permission]
| Permissions | Justification |
| User.Read.All | Read all users’ full profiles |
| TermStore.Read.All | Read term store data |
| Group.Read.All | Read all groups |
| Profile | View users’ basic profile |
| Openid | Sign users in |
| offline_access | Maintain access to data you have given it access to |
| AllSites.FullControl | Have full control of all site collections |
Required Permissions for Target Connector:
Admin Consent: [Delegated Permission]
| Permissions | |
| User.ReadWrite.All | Read and write all users’ full profiles |
| TermStore.ReadWrite.All | Read and write term store data |
| Group.ReadWrite.All | Read and write all groups |
| Profile | View users’ basic profile |
| Openid | Sign users in |
| offline_access | Maintain access to data you have given it access to |
| AllSites.FullControl | Have full control of all site collections |
Note: Apps4.Pro supports MFA and Modern Authentication and hence there is no need to disable security features.
App Installation
Contact us at presales@apps4.pro to get the latest version of the SharePoint Online Migration application download and installation process.
During the installation process, all necessary software required for the application (listed below) will be installed.
- Node-v20.9.0-x64
- Microsoft EdgeWebView2 Runtime
- ASP.NET Core Runtime 6.0.20 x64
- .NET Desktop Runtime 6.0.21 x64
- Dotnet-sdk-3.1.426
Connect your Source & Target Environments
Source Connector Account – Sign-in
Establish a connection with the Source Connector Account by signing in through the Apps4.Pro Migration Manager app.
Steps to Connect:
- Go to the Setup tab in the Migration App.
- Under Source Connection, click on the Copy & Open button.
- Paste the copied code into the authentication window.
- Enter the Source Connector Account details to complete the connection.
Target Connector Account – Sign-in
Establish a connection with the Target Connector Account by signing in through the Apps4.Pro Migration Manager app.
Steps to Connect:
- Go to the Setup tab in the Migration App.
- Under Target Connection, click on the Copy & Open button.
- Paste the copied code into the authentication window.
- Enter the Target Connector Account details to complete the connection.
Configure SharePoint Connectors
To migrate the SharePoint sites & content, you must configure the SharePoint Source & Target Connectors.
Application Tenant Data Refresh
Perform an Application Data Refresh before you start the Migration.
- Navigate to “Settings -> App Data”.
- Select the checkbox next to the below resources to perform a full sync of the app data resources for the following resources:
- Source Tenant Users
- Target Tenant Users
- Source Tenant Groups
- Target Tenant Groups
- Source Tenant Sites
- Target Tenant Sites
Note:
- Click on
 icon to download the source and target users, which can be used to frame the Tenant-level Users Mapping.
 - If the checkbox is unselected, it performs an incremental refresh from the last time it was refreshed. You could also find the time when the data was previously refreshed here.
Configurations
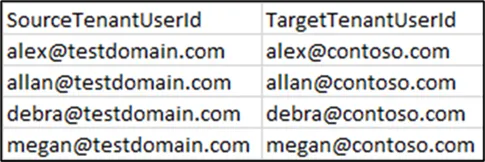
Application Users Mapping
The users in the source and target tenants need to be mapped so the app can intelligently utilize this information during migration.
Steps to Perform User Mapping:
Navigate to the “Mapping” tab → USERS MAPPING. Here, you can add user mappings based on any of the options listed below.
Option 1 – Individual Manual Mapping : Manually add user mappings using the “Add” option.
Option 2 – Bulk Mapping through Auto Map: If users display names or UPN in the source and target tenants are the same, our tool provides an “Automap” feature to streamline the mapping process.
Option 3 – Upload bulk mappings through CSV: If the display names of the users in the source and target tenants are different, you can download the sample file, add the user mappings, and import them using the “Import CSV” option.
You can download the tenant-level users to frame the Mapping CSV, please refer to Application Tenant Data Refresh.
Sample CSV File
Important: Using the “Clear All” option you can clear the previously added mappings in a single shot.
Application Groups Mapping
The Office 365 and Security groups in the Source and Target tenants need to be mapped, to get the group-level unique permissions of a SharePoint site to be migrated successfully.
Steps to Perform Group Mapping:
Navigate to the “Mapping” tab → GROUPS MAPPING. Here, you can add Group mappings based on any of the options listed below.
Option 1 – Individual Manual Mapping: Manually add Group mappings using the “Add” option.
Option 2 – Bulk Mapping through Auto Map: If Groups display names or UPN in the source and target tenants are the same, our tool provides an “Automap” feature to streamline the mapping process.
Option 3 – Upload bulk mappings through CSV : If the display names of the Groups in the source and target tenants are different, you can download the sample file, add the Group mappings, and import them using the “Import CSV” option.
Sample CSV File
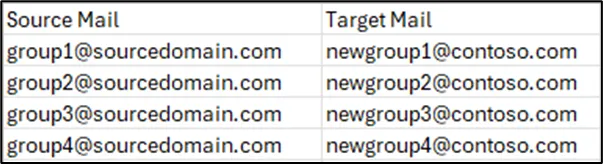
Important: Using the “Clear All” option you can clear the previously added mappings in a single shot.
Migrate Version and Meta data
Apps4.Pro also migrates versions and metadata. You can choose to migrate all versions or only the latest ‘n’ versions based on your preference.
- Navigate to Settings -> Other settings -> SharePoint Site Settings.
- Enable the Option “Migrate File Version History”.
- Choose file version limit based on your preference.
Note:
1. RECOMMENDED: Opting for more versions slows down the migration process. So, the tool recommends unchecking this option, which migrates only the latest version of the File.
2. When opting for more versions, the tool recommends users configure a maximum up to 200 versions.
Settings to Migrate Global Term Groups
To get the Global Term Groups migrated, enable the flag ‘Migrate Global Term Groups’ from Settings -> Other Settings -> SharePoint Site Settings.
Note: This has to be done before you initiate the migration.
Skip Permission during Initial Migration [OPTIONAL]
When there are active users in Target Tenant, migrating the File permissions in the first place gives the active users access to the migrated content during the migration.
This may affect the course of Migration. To avoid this, you can disable the below setting before the Initial Migration and then post completion of Initial Migration, enable the setting and re-trigger migration.
- Settings tab –> Other settings –> SharePoint Site settings -> “Migrate Permissions”
Once all the above preparatory steps are done, you are ready to create a Migration Task.
Recommended: We recommend running a small pilot migration (perhaps one or two SharePoint sites) before moving all sites, to validate your setup and measure throughput.
Start SharePoint Online Migration
Step 1: Create Task
Follow the below steps to create a task
Step 1 : Navigate to ‘SharePoint’ tab.
Step 2 : Hit ‘Refresh’ to load the Sites.
Step 3 : Select the Sites to Migrate.
- Option 1 : Select required Source Sites to migrate from the listed Sites.
- Option 2 : Upload bulk Sites via CSV using Migration from CSV
- Click Migration from CSV. A window appears.
- Download a sample CSV by clicking the Sample CSV button.
Sample CSV
- Add only the Source Site URLs for new Sites Mapping; add both Source and Target Site URLs for existing Sites Mapping.
- Now, click Browse to upload the updated CSV containing the details of the Sites to be Migrated.

Step 4 : Click Migrate
Migration settings
You can also choose the components to be part of the Microsoft SharePoint Migration that includes
- Site Settings
- Generic Lists
- Document Library
- Site Assets
- Files & Folders
- OneNote
- Subsites
- Term Groups
- Pages
- Navigation
- Regional Settings
- External User Permission – When there are external users who are site members, enabling this option will share an invite to join the Target Site”.
Step 2: Add Source Connector as Site Admin
During the validation check, if the Source Connector Account is not an admin of a site chosen for migration, the tool diligently provides an option to the user to add the account as admin to the source site. The user can choose to
- Skip that particular site and proceed with the migration of the rest of the sites OR
- Add the source connector as an admin to the chosen site and proceed with the migration
Step 3: Target Settings
Site Settings
- You can choose how do you want the target site(s) to be. You will have following two options to decide on.
- Migrate into a new Site (OR)
- Append all site content into an existing Site
- You can choose to migrate the Settings – Site Settings, Page Settings, Navigation Settings
- You can choose to migrate the Term Groups part of the site
- You can choose to edit the name of the new Site by clicking on the + button, under ‘Target Site Mapping’ column.
Note: Apps4.Pro does not auto-map the Source & Target Sites with the same name.
Subsite Settings
It is very much similar to the Site settings except that the migration of Lists and Library are decided from their parent sites settings.
List Settings
You can choose how do you want the list in the target site(s) to be. You will have following two options to decide on.
- Migrate into a new list (OR)
- Append the list content into an existing list
When migrating to an existing list, you can choose to migrate the List Settings.
Library Settings
You have the option to
- Select the Document libraries that you must migrate to the target tenant by selecting the checkbox next to them.
- Choose to migrate to a new Library or an existing one in the target tenant.
Step 4: Task Execution
You can track the progress and migration status in the TASKS section.
- Task in Queue:
After task creation, it enters the Queue section, awaiting processing. - Task in InProgress:
The task then moves to In Progress, where migration begins. During this stage, all site contents along with their settings are transferred from the Source to the Target. - Task in Pause:
The task can be paused if needed, temporarily halting the migration process. - Task completed:
Once the migration is successfully completed, the task moves to the Completed section.
View Details: Under Details column, you can check the detailed status of each action (like Migrate Site, Migrate File, Migrate Permission) at Site level.
Edit Task:
- You can edit the Task Details by clicking
 Edit.
Edit. - Make changes as required.
Note: If any of the components of the Migration Settings was missed during the Task creation, you can enable them here.
- Click ‘Save’.
- The Edited Task stops execution and moves to STOPPED tab.
- From STOPPED tab, you can Resume the task.
Step 5: How to resolve errors using ‘Retry’ Option ?
- Navigate to SharePoint -> Tasks -> Completed
- Select tasks that Completed with Errors / Warnings
- Click ‘Retry’
Step 6: How to perform ‘Incremental Migration’
- Navigate to SharePoint -> Tasks -> Completed
- Select the Sites for which you need Incremental Migration
- Click ‘Rerun’, the Incremental Migration gets executed.
Note: If Status of the task is either “Completed with Errors / Completed with Warnings”, please review the errors / warnings with the Support team, before you proceed with the Incremental Migration.
Step 7: Get Summary view of the Migration Tasks
- Navigate to SharePoint -> Summary
- Click
 Sync to load the latest Task Summary
 - All Tasks Results : Lists down all the tasks including the ones Completed with Errors & Warnings. You can also Retry the tasks that are Completed with Errors / Warnings from here.
Here, you get the
1. Overall Task-wise Success / Failed count on
– Document Library
– Files
– Lists
– List Items
2. Specific error / warning wise count. - All Tasks Errors : Lists down all the tasks that were Completed with Errors. Here, you get the detailed error message Item-wise.
- All Tasks Warnings : Lists down all the tasks that were Completed with Warnings. Here, you get the detailed warning message Item-wise.
Email Notification
When migrating a site to the target tenant, each member of the site will get an email notification.
Post Migration
End-User Experience
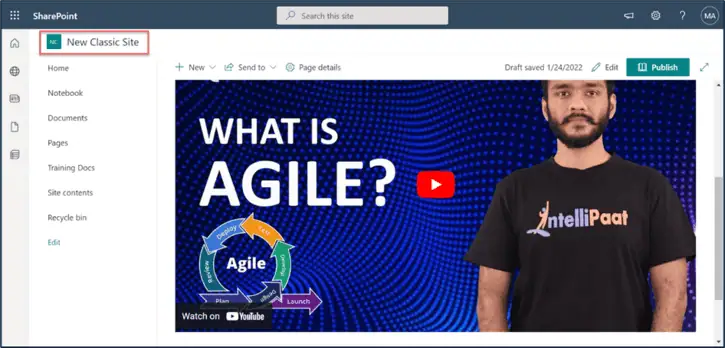
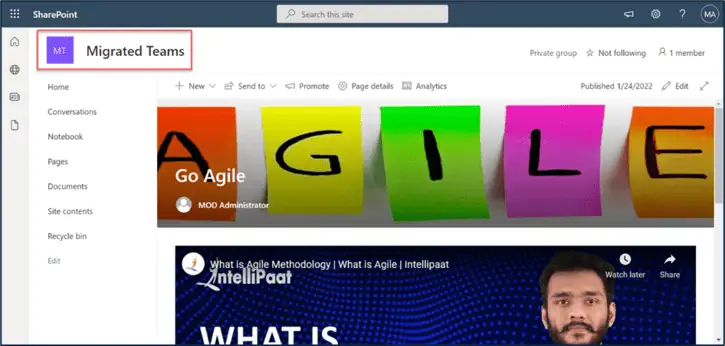
Document Library
Source
Target
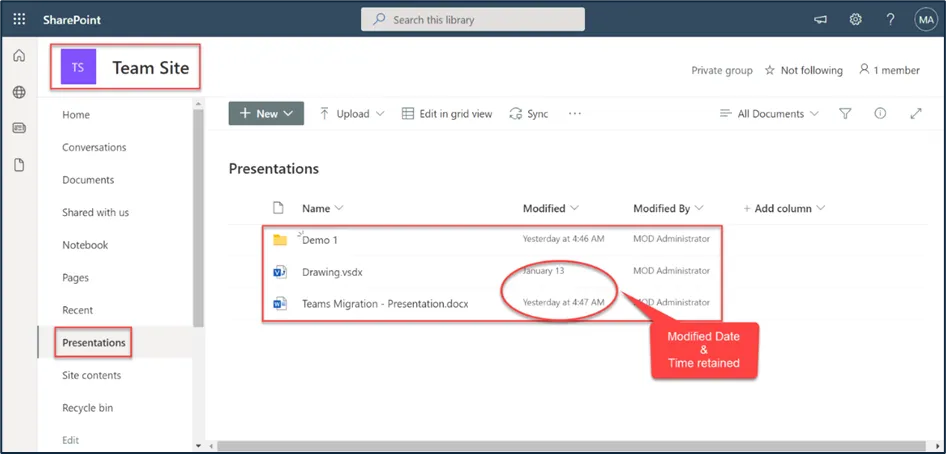
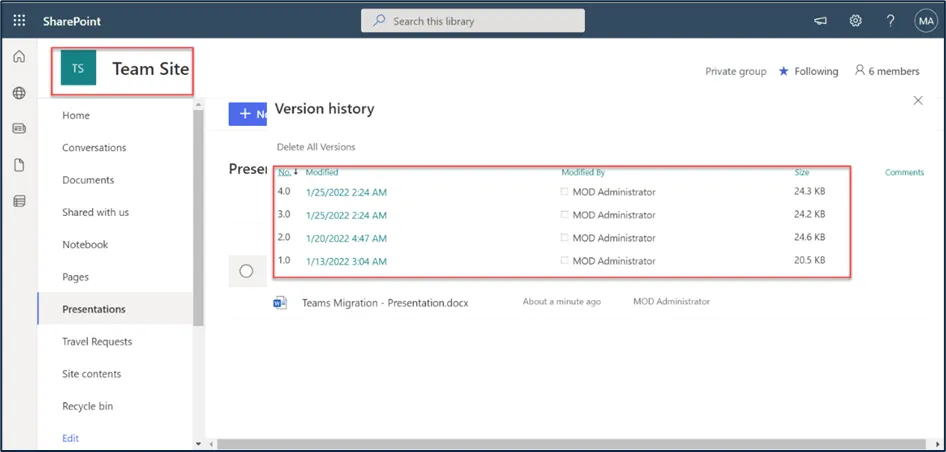
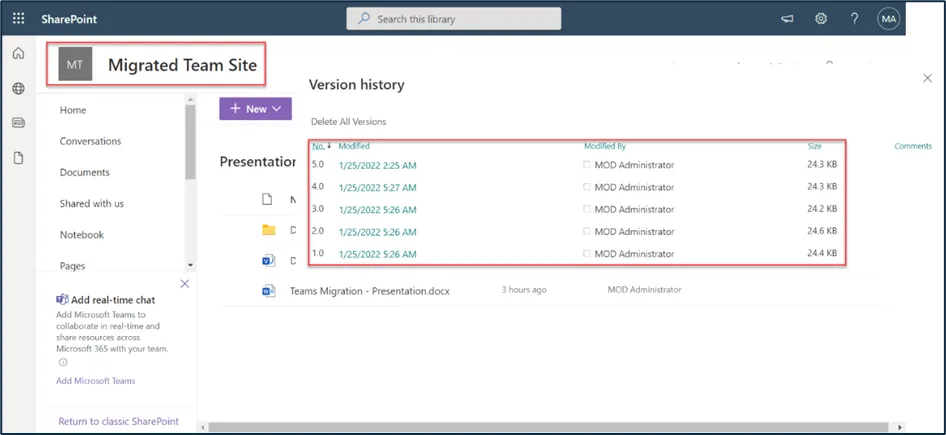
Version history
Source
Target
Hub Site
Source
Target
Logo & Theme
Source
Target
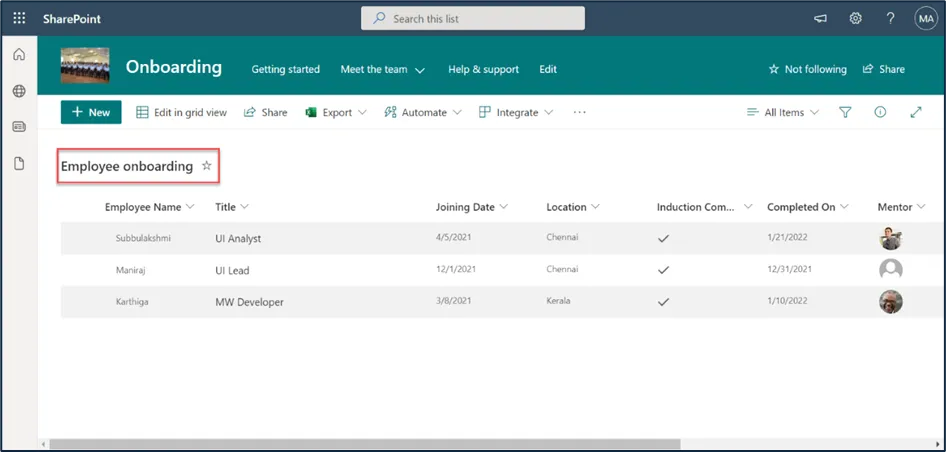
List
Source
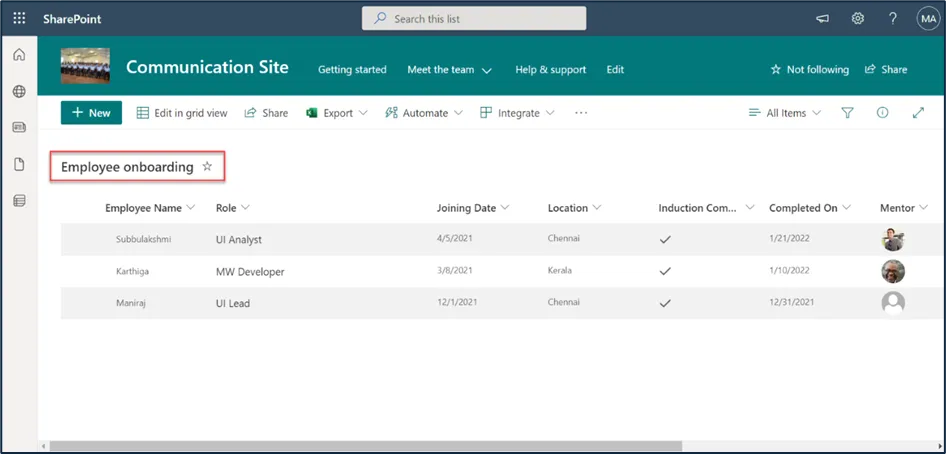
Target
Page Content
Source
Target
New Column
Source
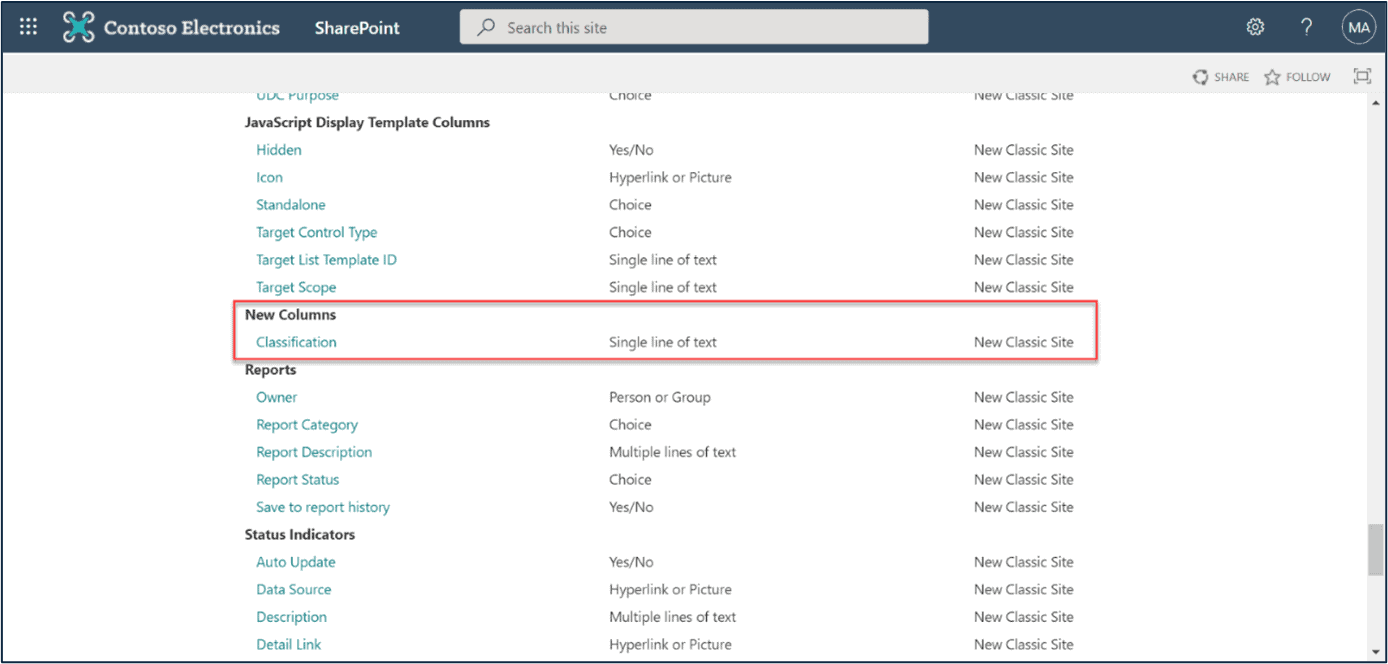
Target

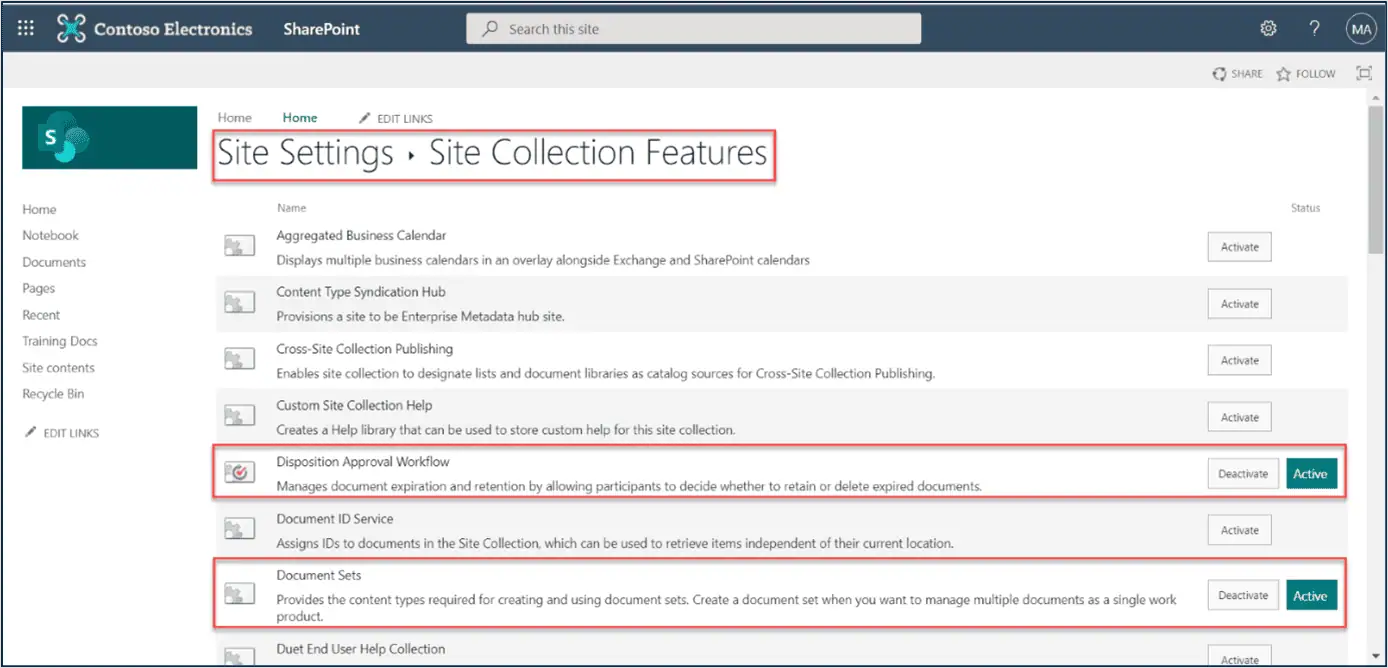
Site Collection Features
Source
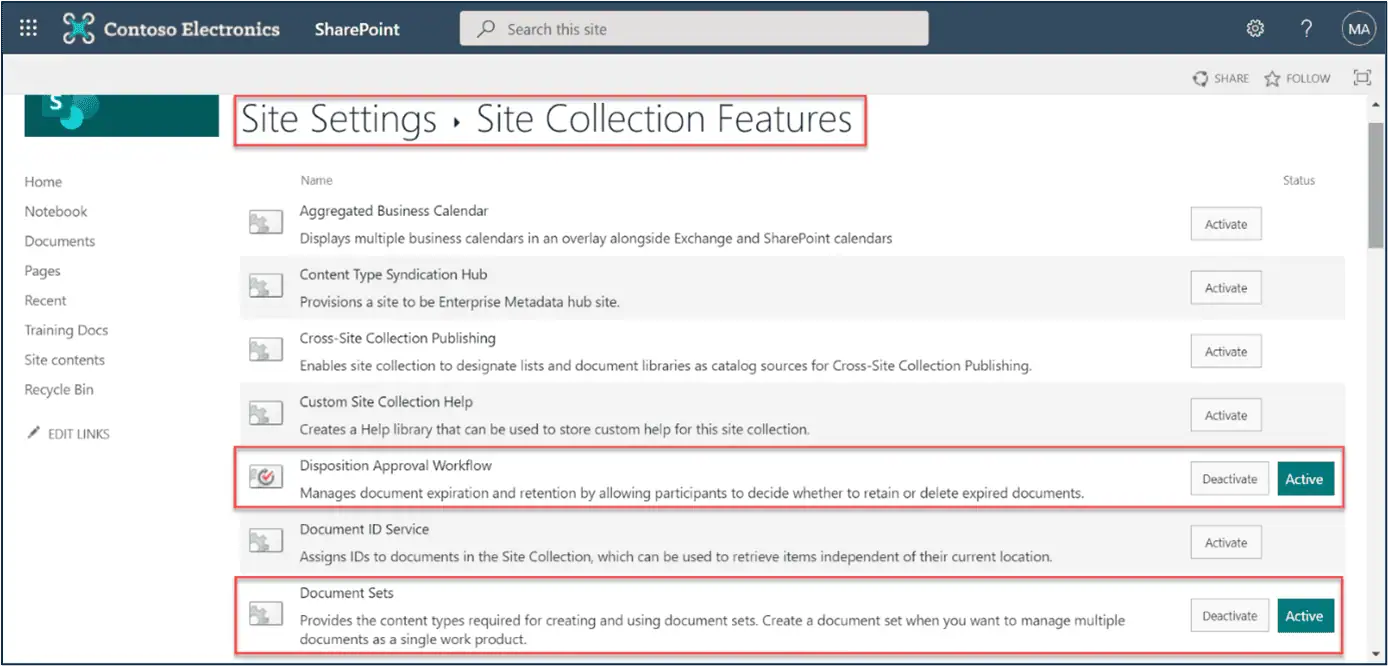
Target
Troubleshoot
If you require support or guidance on the errors, warnings or non-migrated items, get the logs and mail them to support@jijitechnologies.com for further analysis.
To get the logs, go to the SharePoint tab -> TASKS -> COMPLETED -> Export Logs.
Reports
Site Migration Summary Report
The “Site Migration Summary” report provides a comprehensive overview of the Apps4.Pro migration, detailing the total number of Document Libraries, Lists, List Items and Files in the Source Sites, along with the Apps4.Pro migrated counts for each item. This report helps in verifying the completeness of the migration process and ensures data consistency between the source and destination environments.
Steps to Generate the “Site Migration Summary“ Report:
- Go to Plans → Reports → Migrated Summary V2 section.
- Select the “Site Migration Summary“ report.
- Click the “Generate” button to populate the values.
Important: Verify the migration of a few random Site’s Libraries and Files to ensure they are visible in Target Tenant and files are accessible.
Conclusion
In summary, Apps4.Pro Migration Manager provides a reliable and efficient solution for migrating Microsoft SharePoint sites and content between Office 365 tenants. By following this guide, administrators can ensure data integrity, minimize downtime, and maintain seamless collaboration. For additional support, consult the FAQs or contact our support team at support@jijitechnologies.com.
 Migrate
 Manage

